
[한글 문서화] Gallery of Examples
word_cloud GitHub Page의 Gallery of Examples 항목을 번역 및 보완한 문서입니다.
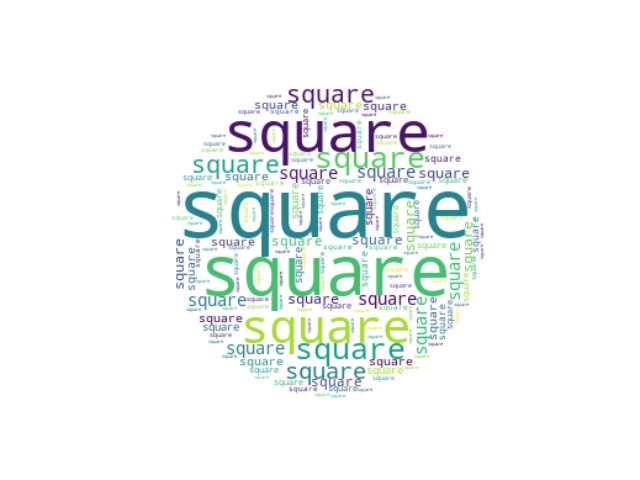
단일 단어 (Single Word)
반복되는 단어로 Word cloud를 만들기.
import numpy as np
import matplotlib.pyplot as plt
from wordcloud import WordCloud

text = "square"

x, y = np.ogrid[:300, :300]

mask = (x - 150) ** 2 + (y - 150) ** 2 > 130 ** 2
mask = 255 * mask.astype(int)


wc = WordCloud(background_color="white", repeat=True, mask=mask)
wc.generate(text)

plt.axis("off")
plt.imshow(wc, interpolation="bilinear")
plt.show()
Script의 총 실행 시간: ( 0 분 0.532 초)
아랍어로 wordcloud 만들기 (Create wordcloud with Arabic)
아랍어 텍스트에서 word cloud 생성
Dependencies : - bidi.algorithm - arabic_reshaper
Dependencies 설치: pip install python-bidi arabic_reshape
Out:
<wordcloud.wordcloud.WordCloud object at 0x7fa0f73e5fd0>
import os
import codecs
from wordcloud import WordCloud
import arabic_reshaper
from bidi.algorithm import get_display

# get data directory (getcwd()를 사용하여 생성된 IPython 노트북의 실행 예제를 지원해야 함)
d = os.path.dirname(__file__) if "__file__" in locals() else os.getcwd()

# 전체 본문을 읽는다.
f = codecs.open(os.path.join(d, 'arabicwords.txt'), 'r', 'utf-8')

# Word cloud처럼 아라빅이 아닌 라이브러리에 대해 텍스트를 읽을 수 있도록 설정
text = arabic_reshaper.reshape(f.read())
text = get_display(text)

# World cloud 이미지 생성
wordcloud = WordCloud(font_path='fonts/NotoNaskhArabic/NotoNaskhArabic-Regular.ttf').generate(text)

# 이미지로 내보내기
wordcloud.to_file("arabic_example.png
Script의 총 실행 시간: ( 0 분 0.929 초)
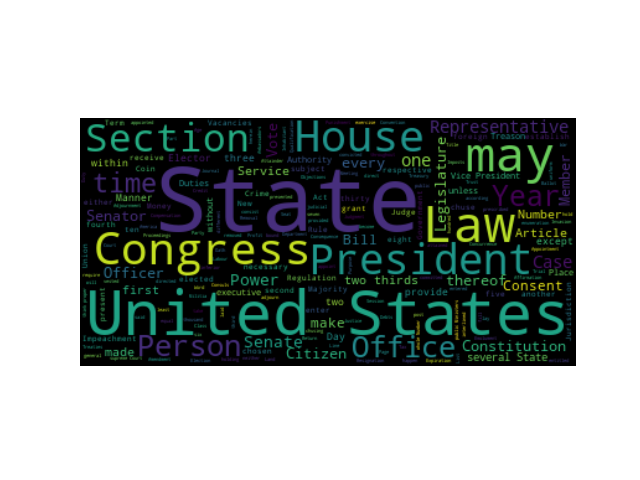
Minimal Example
기본 인수를 사용하여 직각의 미국 헌법 wordcloud 생성
import os
from os import path
from wordcloud import WordCloud
# get data directory (getcwd()를 사용하여 생성된 IPython 노트북의 실행 예제를 지원해야 함)
d = path.dirname(__file__) if "__file__" in locals() else os.getcwd()
# 전체 본문을 읽는다.
text = open(path.join(d, 'constitution.txt')).read()
# World cloud 이미지 생성
wordcloud = WordCloud().generate(text)
# 생성된 이미지 표시:
# matplotlib 방식:
import matplotlib.pyplot as plt
plt.imshow(wordcloud, interpolation='bilinear')
plt.axis("off")
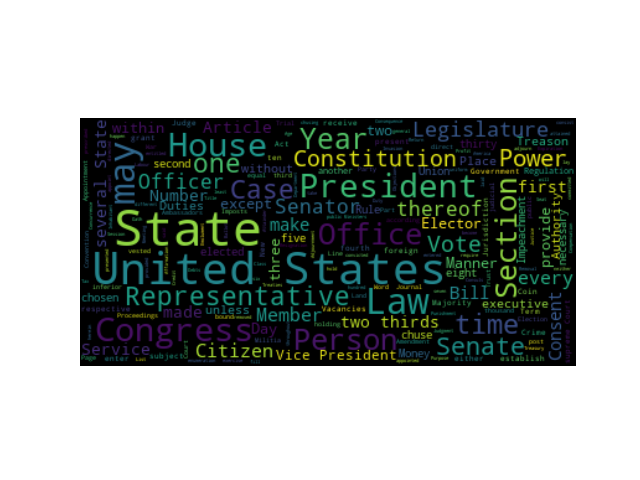
# 낮은 max_font_size
wordcloud = WordCloud(max_font_size=40).generate(text)
plt.figure()
plt.imshow(wordcloud, interpolation="bilinear")
plt.axis("off")
plt.show()
# The pil way (matplotlib가 없을 경우)
# image = wordcloud.to_image()
# image.show()
Script의 총 실행 시간: ( 0 분 1.024 초)
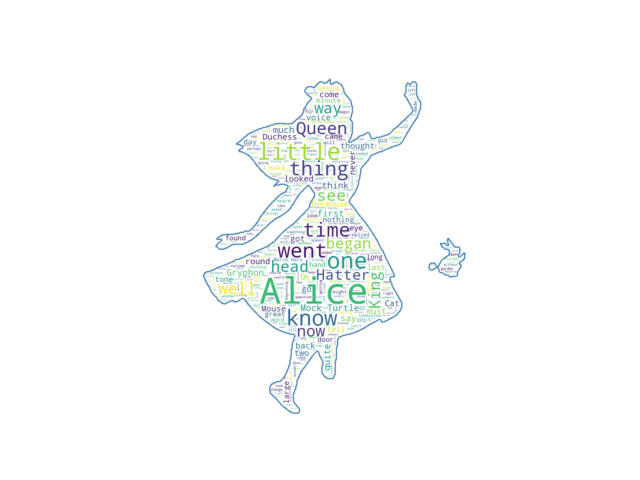
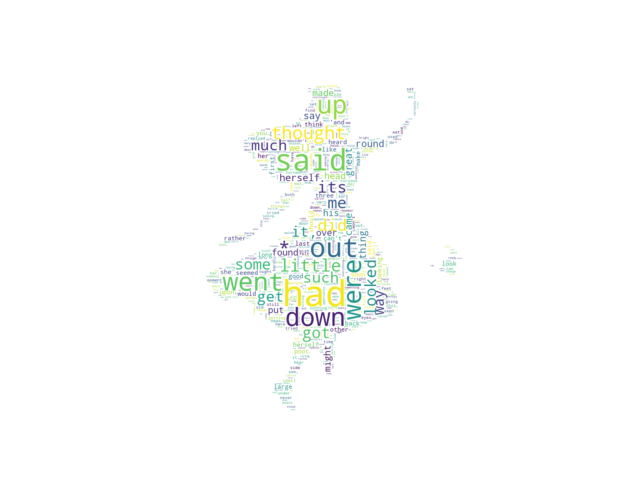
차폐된 Wordcloud (Masked wordcloud)
Mask를 사용하면 임의의 모양으로 word cloud를 생성할 수 있습니다

from os import path
from PIL import Image
import numpy as np
import matplotlib.pyplot as plt
import os

from wordcloud import WordCloud, STOPWORDS

# get data directory (getcwd()를 사용하여 생성된 IPython 노트북의 실행 예제를 지원해야 함)
d = path.dirname(__file__) if "__file__" in locals() else os.getcwd()

# 전체 본문을 읽는다.
text = open(path.join(d, 'alice.txt')).read()

# mask 이미지를 읽는다.
# taken from
# http://www.stencilry.org/stencils/movies/alice%20in%20wonderland/255fk.jpg
alice_mask = np.array(Image.open(path.join(d, "alice_mask.png")))

stopwords = set(STOPWORDS)
stopwords.add("said")

wc = WordCloud(background_color="white", max_words=2000, mask=alice_mask,
               stopwords=stopwords, contour_width=3, contour_color='steelblue')

# World cloud 이미지 생성
wc.generate(text)

# 파일에 저장하기
wc.to_file(path.join(d, "alice.png"))

# show
plt.imshow(wc, interpolation='bilinear')
plt.axis("off")
plt.figure()
plt.imshow(alice_mask, cmap=plt.cm.gray, interpolation='bilinear')
plt.axis("off")
plt.show()
Script의 총 실행 시간: ( 0 분 5.110 초)
사용 빈도 (Using frequency)
단어 빈도 사전을 사용한다
import multidict as multidict

import numpy as np

import os
import re
from PIL import Image
from os import path
from wordcloud import WordCloud
import matplotlib.pyplot as plt


def getFrequencyDictForText(sentence):
    fullTermsDict = multidict.MultiDict()
    tmpDict = {}

    # 빈도 계산에 대한 명령어 작성
    for text in sentence.split(" "):
        if re.match("a|the|an|the|to|in|for|of|or|by|with|is|on|that|be", text):
            continue
        val = tmpDict.get(text, 0)
        tmpDict[text.lower()] = val + 1
    for key in tmpDict:
        fullTermsDict.add(key, tmpDict[key])
    return fullTermsDict


def makeImage(text):
    alice_mask = np.array(Image.open("alice_mask.png"))

    wc = WordCloud(background_color="white", max_words=1000, mask=alice_mask)
    # World cloud 생성
    wc.generate_from_frequencies(text)

    # show
    plt.imshow(wc, interpolation="bilinear")
    plt.axis("off")
    plt.show()


# get data directory (getcwd()를 사용하여 생성된 IPython 노트북의 실행 예제를 지원해야 함)
d = path.dirname(__file__) if "__file__" in locals() else os.getcwd()

text = open(path.join(d, 'alice.txt'), encoding='utf-8')
text = text.read()
makeImage(getFrequencyDictForText(text))
Script의 총 실행 시간: ( 0 분 4.469 초)
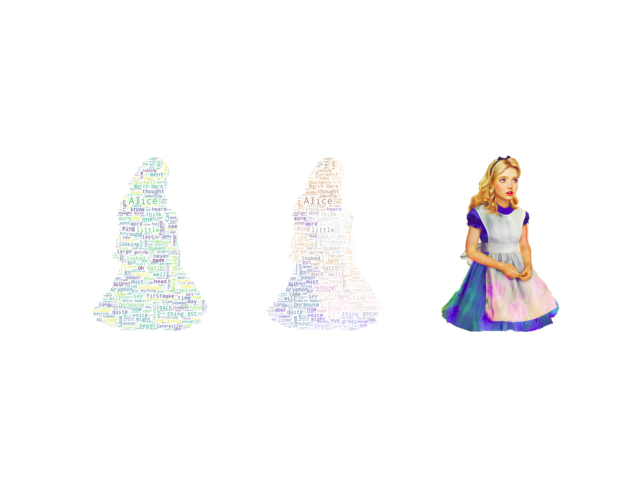
이미지 컬러 (Image-colored wordcloud)
ImageColorGenerator에서 구현된 이미지 기반 색상 지정 방법을 사용하여 word cloud를 채색할 수 있습니다. 소스 이미지에서 단어가 차지하는 영역의 평균 색상을 사용합니다. 이것은 masking과 결합할 수 있습니다. 순수한 흰색은 mask로 전달될 때 WordCloud 객체에서 ‘사용하지 않음’으로 해석됩니다. 법적 색상으로 흰색을 원할 경우 다른 이미지를 “마스크”에 전달하기만 하면 되지만 이미지 모양이 정렬되도록 하십시오.
from os import path
from PIL import Image
import numpy as np
import matplotlib.pyplot as plt
import os

from wordcloud import WordCloud, STOPWORDS, ImageColorGenerator

# get data directory (getcwd()를 사용하여 생성된 IPython 노트북의 실행 예제를 지원해야 함)
d = path.dirname(__file__) if "__file__" in locals() else os.getcwd()

# 전체 본문을 읽는다.
text = open(path.join(d, 'alice.txt')).read()

# mask/색상 이미지 읽기
# http://jirkavinse.deviantart.com/art/quot-Real-Life-quot-Alice-282261010
alice_coloring = np.array(Image.open(path.join(d, "alice_color.png")))
stopwords = set(STOPWORDS)
stopwords.add("said")

wc = WordCloud(background_color="white", max_words=2000, mask=alice_coloring,
               stopwords=stopwords, max_font_size=40, random_state=42)
# Word cloud 생성
wc.generate(text)

# 이미지에서 색상 생성
image_colors = ImageColorGenerator(alice_coloring)

# show
fig, axes = plt.subplots(1, 3)
axes[0].imshow(wc, interpolation="bilinear")
# word cloud 색상 변경 후 show
# 생성자에게 직접적으로 color_func=image_colors를 줄 수 있다.
axes[1].imshow(wc.recolor(color_func=image_colors), interpolation="bilinear")
axes[2].imshow(alice_coloring, cmap=plt.cm.gray, interpolation="bilinear")
for ax in axes:
    ax.set_axis_off()
plt.show()
Script의 총 실행 시간: ( 0 분 3.193 초)
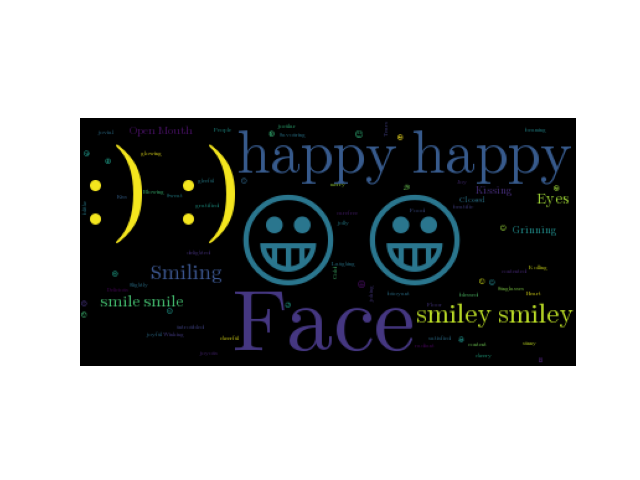
이모티콘 예시 (Emoji Example)
그림 이모티콘을 포함하는 방법을 보여주는 간단한 예입니다. 이 예제는 OS X에서는 작동하지 않지만 Ubuntu에서는 올바르게 작동합니다.
그림 이모티콘을 포함하기 위해 따라야 할 3가지 중요한 단계가 있습니다. 1) built in open 대신 io.open으로 텍스트 입력을 읽습니다. 이렇게 하면 UTF-8으로 load됩니다. 2) Word cloud가 사용하는 정규식을 재정의하여 텍스트를 단어로 구문 분석합니다. 기본 표현식은 ASCII 단어와만 일치합니다. 3) 기본 글꼴을 그림 이모티콘을 지원하는 것으로 재정의합니다. 포함된 Symbola 글꼴에는 대부분의 이모티콘에 대한 흑백 윤곽선이 포함되어 있습니다. 현재 OS X (https://github.com/python-pillow/Pillow/issues/1774)에서 올바르게 작동하지 못하게 하는 PIL / Pillow 라이브러리에 문제가 있으므로, 문제가 있는 경우 우분투에서 시도하십시오.
import io
import os
import string
from os import path
from wordcloud import WordCloud

# get data directory (getcwd()를 사용하여 생성된 IPython 노트북의 실행 예제를 지원해야 함)
d = path.dirname(__file__) if "__file__" in locals() else os.getcwd()

# 파일을 UTF-8로 올바르게 로드하려면 io.open을 사용하는 것이 중요하다.
text = io.open(path.join(d, 'happy-emoji.txt')).read()

# 단어 찾기에 사용되는 regex는 정상어, ascii art, emojis의 조합이다.
# 2+ consecutive letters (also include apostrophes), e.x It's
normal_word = r"(?:\w[\w']+)"
# 2+ consecutive punctuations, e.x. :)
ascii_art = r"(?:[{punctuation}][{punctuation}]+)".format(punctuation=string.punctuation)
# alpha_datable 또는 기타 아스키 print가 불가능한 단일 문자
emoji = r"(?:[^\s])(?<![\w{ascii_printable}])".format(ascii_printable=string.printable)
regexp = r"{normal_word}|{ascii_art}|{emoji}".format(normal_word=normal_word, ascii_art=ascii_art,
                                                     emoji=emoji)

# World cloud 이미지 생성
# The Symbola font includes most emoji
font_path = path.join(d, 'fonts', 'Symbola', 'Symbola.ttf')
wc = WordCloud(font_path=font_path, regexp=regexp).generate(text)

# 생성된 이미지 표시:
# matplotlib 방식:
import matplotlib.pyplot as plt
plt.imshow(wc)
plt.axis("off")
plt.show()
Script의 총 실행 시간: ( 0 분 0.539 초)
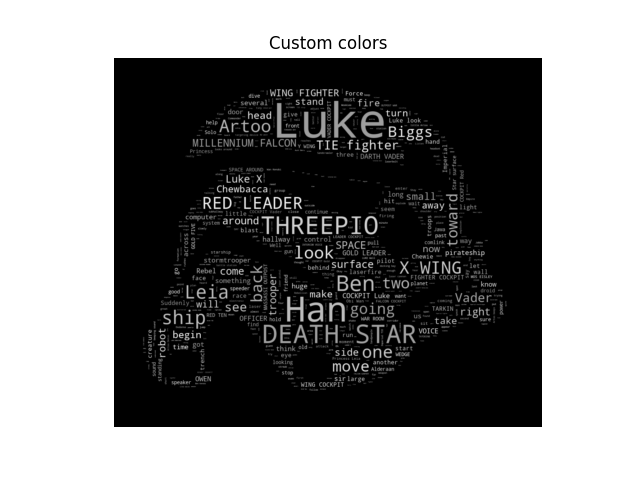
맞춤 색상 사용 (Using custom colors)
색상 변경 방법 및 사용자 지정 색상 기능 사용

import numpy as np
from PIL import Image
from os import path
import matplotlib.pyplot as plt
import os
import random

from wordcloud import WordCloud, STOPWORDS


def grey_color_func(word, font_size, position, orientation, random_state=None,
                    **kwargs):
    return "hsl(0, 0%%, %d%%)" % random.randint(60, 100)


# getcwd()를 사용하여 생성된 IPython 노트북의 실행 예를 지원해야 하는 데이터 디렉토리 가져오기
d = path.dirname(__file__) if "__file__" in locals() else os.getcwd()

# mask 이미지 읽기 from
# http://www.stencilry.org/stencils/movies/star%20wars/storm-trooper.gif
mask = np.array(Image.open(path.join(d, "stormtrooper_mask.png")))

# "새로운 희망"의 영화 대본
# http://www.imsdb.com/scripts/Star-Wars-A-New-Hope.html
# 변호사들이 이 일을 공정하게 이용하기를 바란다.
text = open(path.join(d, 'a_new_hope.txt')).read()

# 본문을 조금 pre-processing
text = text.replace("HAN", "Han")
text = text.replace("LUKE'S", "Luke")

# 영화 스크립트별 중요한 단어 추가
stopwords = set(STOPWORDS)
stopwords.add("int")
stopwords.add("ext")

wc = WordCloud(max_words=1000, mask=mask, stopwords=stopwords, margin=10,
               random_state=1).generate(text)
# 기본 컬러 이미지 저장
default_colors = wc.to_array()
plt.title("Custom colors")
plt.imshow(wc.recolor(color_func=grey_color_func, random_state=3),
           interpolation="bilinear")
wc.to_file("a_new_hope.png")
plt.axis("off")
plt.figure()
plt.title("Default colors")
plt.imshow(default_colors, interpolation="bilinear")
plt.axis("off")
plt.show()
Script의 총 실행 시간: ( 0 분 7.464 초)
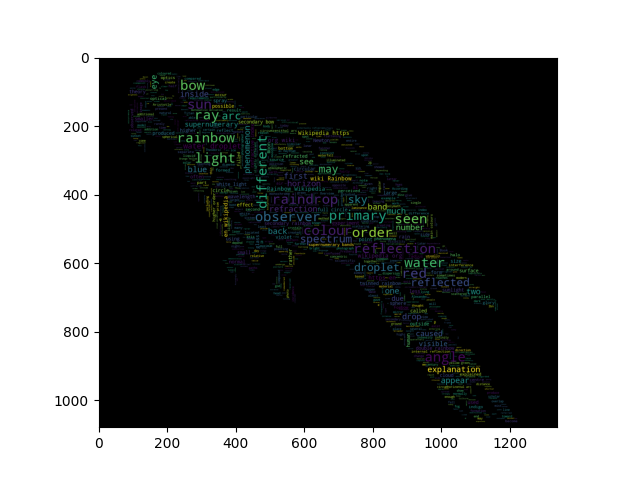
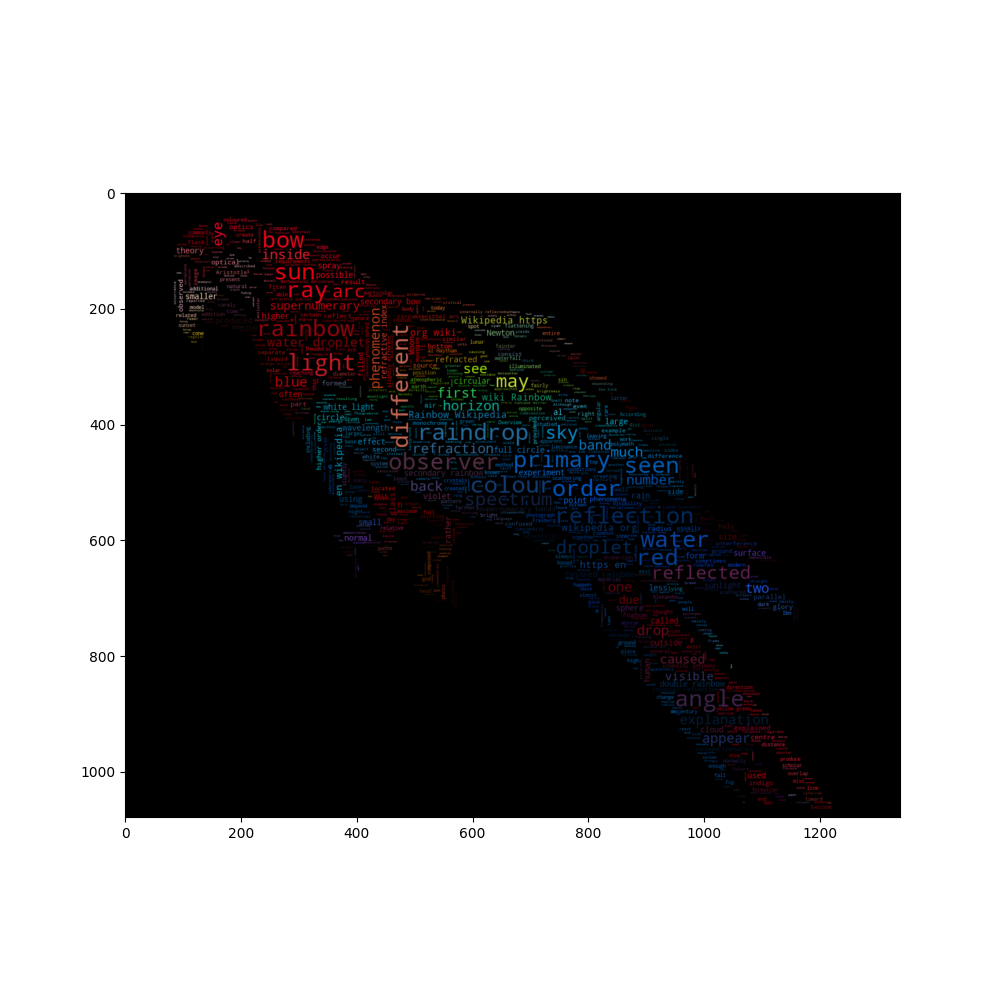
경계 map이 있는 이미지 컬러 wordcloud (Image-colored wordcloud with boundary map)
이미지의 가장자리를 고려한 약간 더 정교한 이미지 색상의 word cloud 버전입니다. 앵무새 예제와 유사한 이미지를 재생성합니다.
import os
from PIL import Image
import numpy as np
import matplotlib.pyplot as plt
from scipy.ndimage import gaussian_gradient_magnitude
from wordcloud import WordCloud, ImageColorGenerator
# get data directory (getcwd()를 사용하여 생성된 IPython 노트북의 실행 예제를 지원해야 함)
d = os.path.dirname(__file__) if "__file__" in locals() else os.getcwd()
# 위키백과 텍스트를 무지개에 로드
text = open(os.path.join(d, 'wiki_rainbow.txt')).read()
# 이미지 로드. 이것은 gimp에서 더 밝고 포화도를 갖도록 수정되었다.
parrot_color = np.array(Image.open(os.path.join(d, "parrot-by-jose-mari-gimenez2.jpg")))
# 3의 인수로 가라앉다. 매우 지루하지만, word cloud 별로 신경 쓰지 않는다.
parrot_color = parrot_color[::3, ::3]
# mask white 생성은 "masked out"
parrot_mask = parrot_color.copy()
parrot_mask[parrot_mask.sum(axis=2) == 0] = 255
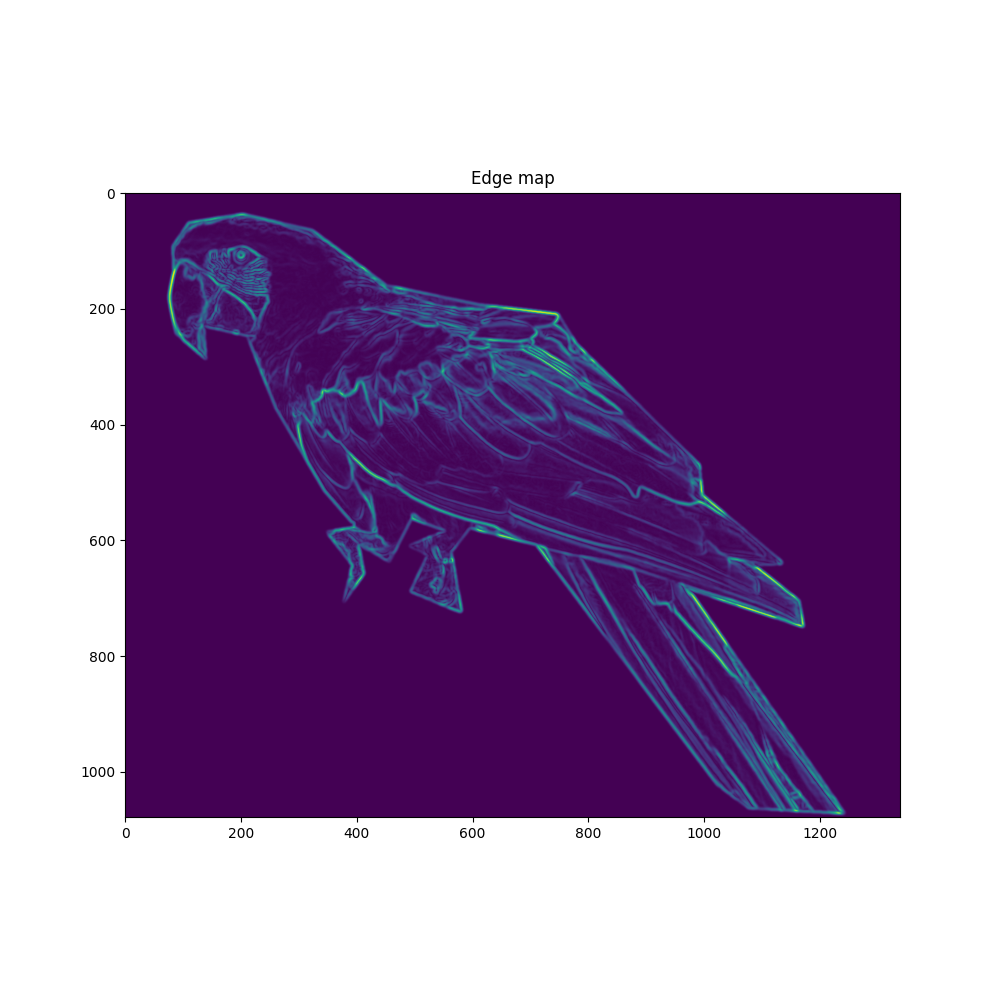
# 몇몇의 기교: 우리는 색의 경계를 강화해서 색이 덜 씻겨지도록 한다.
# 이를 위해 이미지에서 edge 탐지를 한다.
edges = np.mean([gaussian_gradient_magnitude(parrot_color[:, :, i] / 255., 2) for i in range(3)], axis=0)
parrot_mask[edges > .08] = 255
# word cloud 생성 약간 느리게, 렌더링 속도를 높이기 위해 더 강하게 서브 샘플링할 수 있음
# relative_reason=0은 데이터의 빈도가 적게 반영됨을 의미한다.
# 경솔하지만, 더 나은 그림을 만든다.
wc = WordCloud(max_words=2000, mask=parrot_mask, max_font_size=40, random_state=42, relative_scaling=0)
# word cloud 생성
wc.generate(text)
plt.imshow(wc)
# 이미지로 색칠을 하다.
image_colors = ImageColorGenerator(parrot_color)
wc.recolor(color_func=image_colors)
plt.figure(figsize=(10, 10))
plt.imshow(wc, interpolation="bilinear")
wc.to_file("parrot_new.png")
plt.figure(figsize=(10, 10))
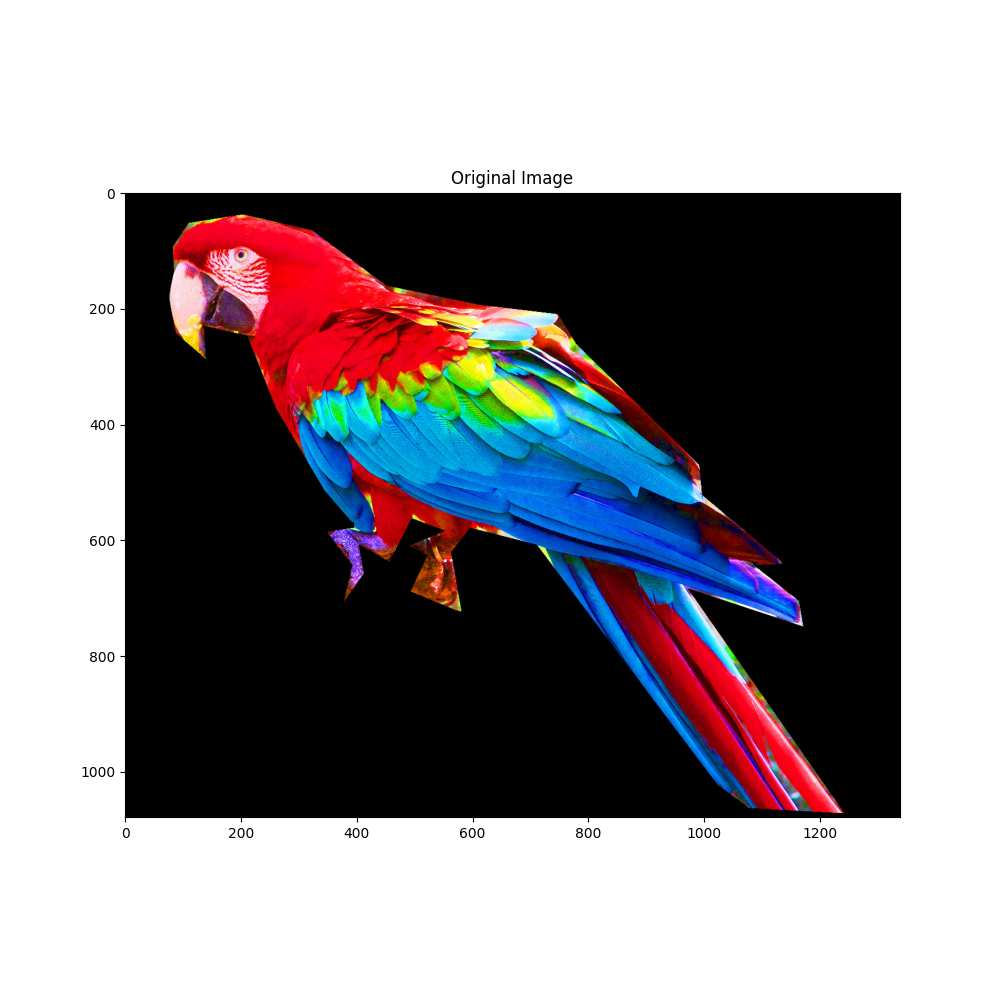
plt.title("Original Image")
plt.imshow(parrot_color)
plt.figure(figsize=(10, 10))
plt.title("Edge map")
plt.imshow(edges)
plt.show()
Script의 총 실행 시간: ( 0 분 24.454 초)
중국어로 wordcloud 만들기 (create wordcloud with chinese)
Wordcloud는 매우 유용한 도구이지만 중국어 wordcloud를 만들려면 wordcloud만으로는 충분하지 않습니다. 이 파일은 중국어에서 wordcloud를 사용하는 방법을 보여줍니다. 먼저, 중국어 단어 분할 라이브러리 jieba가 필요합니다. jieba는 이제 파이썬에서 가장 우아하고 가장 인기있는 중국어 단어 분할 도구입니다. ‘PIP install jieba’를 사용할 수 있습니다. 설치하십시오. 보시다시피, jieba와 함께 wordcloud를 동시에 사용하면 매우 편리합니다.


Out:
Building prefix dict from the default dictionary ...

Dumping model to file cache /tmp/jieba.cache

Loading model cost 1.220 seconds.

Prefix dict has been built successfully.


<wordcloud.wordcloud.WordCloud object at 0x7fa0f6e8e7b8>
import jieba
jieba.enable_parallel(4)
# 병렬 프로세스 설정 :4 , 그러나 Windows에서 실행할 수 없음
from os import path
from imageio import imread
import matplotlib.pyplot as plt
import os
# jieba.load_userdict("txt\userdict.txt")
# load_userdict()에 의해 userdict 추가
from wordcloud import WordCloud, ImageColorGenerator

# get data directory (getcwd()를 사용하여 생성된 IPython 노트북의 실행 예제를 지원해야 함)
d = path.dirname(__file__) if "__file__" in locals() else os.getcwd()

stopwords_path = d + '/wc_cn/stopwords_cn_en.txt'
# 중국어 글꼴을 설정해야 함
font_path = d + '/fonts/SourceHanSerif/SourceHanSerifK-Light.otf'

# worldcloud path 저장
imgname1 = d + '/wc_cn/LuXun.jpg'
imgname2 = d + '/wc_cn/LuXun_colored.jpg'
# 주어진 색상 이미지와 mask 읽기
back_coloring = imread(path.join(d, d + '/wc_cn/LuXun_color.jpg'))

# 전체 파일 읽기
text = open(path.join(d, d + '/wc_cn/CalltoArms.txt')).read()

# wordcloud()를 원하면 사용할 수 있다.
# add_word()에 의해 userdict 추가
userdict_list = ['阿Q', '孔乙己', '单四嫂子']


# Jieba에 의한 텍스트 처리 기능
def jieba_processing_txt(text):
    for word in userdict_list:
        jieba.add_word(word)

    mywordlist = []
    seg_list = jieba.cut(text, cut_all=False)
    liststr = "/ ".join(seg_list)

    with open(stopwords_path, encoding='utf-8') as f_stop:
        f_stop_text = f_stop.read()
        f_stop_seg_list = f_stop_text.splitlines()

    for myword in liststr.split('/'):
        if not (myword.strip() in f_stop_seg_list) and len(myword.strip()) > 1:
            mywordlist.append(myword)
    return ' '.join(mywordlist)


wc = WordCloud(font_path=font_path, background_color="white", max_words=2000, mask=back_coloring,
               max_font_size=100, random_state=42, width=1000, height=860, margin=2,)


wc.generate(jieba_processing_txt(text))

# 색상 이미지 생성
image_colors_default = ImageColorGenerator(back_coloring)

plt.figure()
# word cloud 색상 변경 및 show
plt.imshow(wc, interpolation="bilinear")
plt.axis("off")
plt.show()

# wordcloud 저장
wc.to_file(path.join(d, imgname1))

# 이미지에 의한 색상 생성
image_colors_byImg = ImageColorGenerator(back_coloring)

# show
# we could also give color_func=image_colors directly in the constructor
plt.imshow(wc.recolor(color_func=image_colors_byImg), interpolation="bilinear")
plt.axis("off")
plt.figure()
plt.imshow(back_coloring, interpolation="bilinear")
plt.axis("off")
plt.show()

# wordcloud
wc.to_file(path.join(d, imgname2))
Script의 총 실행 시간: ( 0 분 12.194 초)
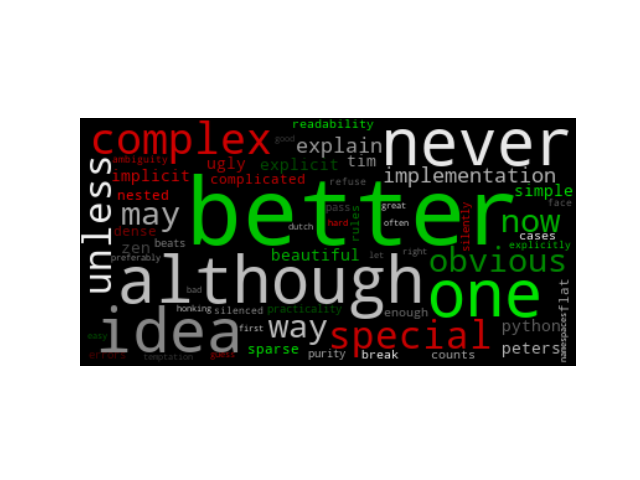
그룹 예시에 의한 채색 (Colored by Group Example)
색상에서 단어로의 사전 정의된 mapping을 기반으로 단어에 색상을 지정하는 word cloud 생성
from wordcloud import (WordCloud, get_single_color_func)
import matplotlib.pyplot as plt


class SimpleGroupedColorFunc(object):
    """Create a color function object which assigns EXACT colors
       to certain words based on the color to words mapping

       Parameters
       ----------
       color_to_words : dict(str -> list(str))
         A dictionary that maps a color to the list of words.

       default_color : str
         Color that will be assigned to a word that's not a member
         of any value from color_to_words.
    """

    def __init__(self, color_to_words, default_color):
        self.word_to_color = {word: color
                              for (color, words) in color_to_words.items()
                              for word in words}

        self.default_color = default_color

    def __call__(self, word, **kwargs):
        return self.word_to_color.get(word, self.default_color)


class GroupedColorFunc(object):
    """Create a color function object which assigns DIFFERENT SHADES of
       specified colors to certain words based on the color to words mapping.

       Uses wordcloud.get_single_color_func

       Parameters
       ----------
       color_to_words : dict(str -> list(str))
         A dictionary that maps a color to the list of words.

       default_color : str
         Color that will be assigned to a word that's not a member
         of any value from color_to_words.
    """

    def __init__(self, color_to_words, default_color):
        self.color_func_to_words = [
            (get_single_color_func(color), set(words))
            for (color, words) in color_to_words.items()]

        self.default_color_func = get_single_color_func(default_color)

    def get_color_func(self, word):
        """Returns a single_color_func associated with the word"""
        try:
            color_func = next(
                color_func for (color_func, words) in self.color_func_to_words
                if word in words)
        except StopIteration:
            color_func = self.default_color_func

        return color_func

    def __call__(self, word, **kwargs):
        return self.get_color_func(word)(word, **kwargs)


text = """The Zen of Python, by Tim Peters
Beautiful is better than ugly.
Explicit is better than implicit.
Simple is better than complex.
Complex is better than complicated.
Flat is better than nested.
Sparse is better than dense.
Readability counts.
Special cases aren't special enough to break the rules.
Although practicality beats purity.
Errors should never pass silently.
Unless explicitly silenced.
In the face of ambiguity, refuse the temptation to guess.
There should be one-- and preferably only one --obvious way to do it.
Although that way may not be obvious at first unless you're Dutch.
Now is better than never.
Although never is often better than *right* now.
If the implementation is hard to explain, it's a bad idea.
If the implementation is easy to explain, it may be a good idea.
Namespaces are one honking great idea -- let's do more of those!"""

# 텍스트가 작은 경우 정렬이 해제되고 텍스트가 낮은 경우
wc = WordCloud(collocations=False).generate(text.lower())

color_to_words = {
    # 아래의 단어는 green 단일 색상 기능으로 색칠됨
    '#00ff00': ['beautiful', 'explicit', 'simple', 'sparse',
                'readability', 'rules', 'practicality',
                'explicitly', 'one', 'now', 'easy', 'obvious', 'better'],
    # 빨간색 단일 색상 기능으로 색상 지정
    'red': ['ugly', 'implicit', 'complex', 'complicated', 'nested',
            'dense', 'special', 'errors', 'silently', 'ambiguity',
            'guess', 'hard']
}

# color_to_words 값에 없는 단어
# 회색 단일 색상 기능으로 색상 지정
default_color = 'grey'

# 단일 톤으로 색상 기능 생성
# grouped_color_func = SimpleGroupedColorFunc(color_to_words, default_color)

# 멀티 톤으로 색상 기능 생성
grouped_color_func = GroupedColorFunc(color_to_words, default_color)

#  색상 적용 함수
wc.recolor(color_func=grouped_color_func)

# Plot
plt.figure()
plt.imshow(wc, interpolation="bilinear")
plt.axis("off")
plt.show()
Script의 총 실행 시간: ( 0 분 0.315 초)